The Long Story Short
You may have read some of Katie's previous posts about the meatbird chickens we've been raising since chicks. If not, you can go back and see. We got two different kinds of Cornish X when they were delivered in a box in the mail. One is meant to be a "broiler" or "fryer". Generally a smaller bird meant for using the legs, thighs, wings, and breasts in various recipes. The second is a "roaster". This bird is raised a few weeks longer, and is intended to be roasted in the oven fully intact.
This past weekend was the time when we needed to butcher the broilers. I know that when I have "chicken on the bone", I personally like the skin when cooked. This meant that the chickens were going to need to be plucked.
I did some research online about some fancy chicken pluckers. The one that came up most, and had plans to follow to build yourself was The Whizbang Chicken Plucker. If you search on Youtube, there are some pretty wild videos. They work extremely well in removing the feathers of a chicken after being slaughtered in seconds, instead of the painstaking process of plucking the feathers by hand.
Power Drill Chicken Plucker
I knew that I didn't want to pluck the birds by hand, and I also knew that we weren't going to buy that fancy Whizbang plucker. So I searched around online and came upon one that you can build using a power drill.
These are the supplies you'll need if you're interested:
4" PVC endcap
2 bungees
6" or 8" 3/8 bolt threaded all the way, nut, and washers (Mine was way too short but it was all I had. If it's longer, you won't whack your hand when you tighten the whole thing to the drill)
You'll need a 3/8 drill bit to drill the holes in the endcap

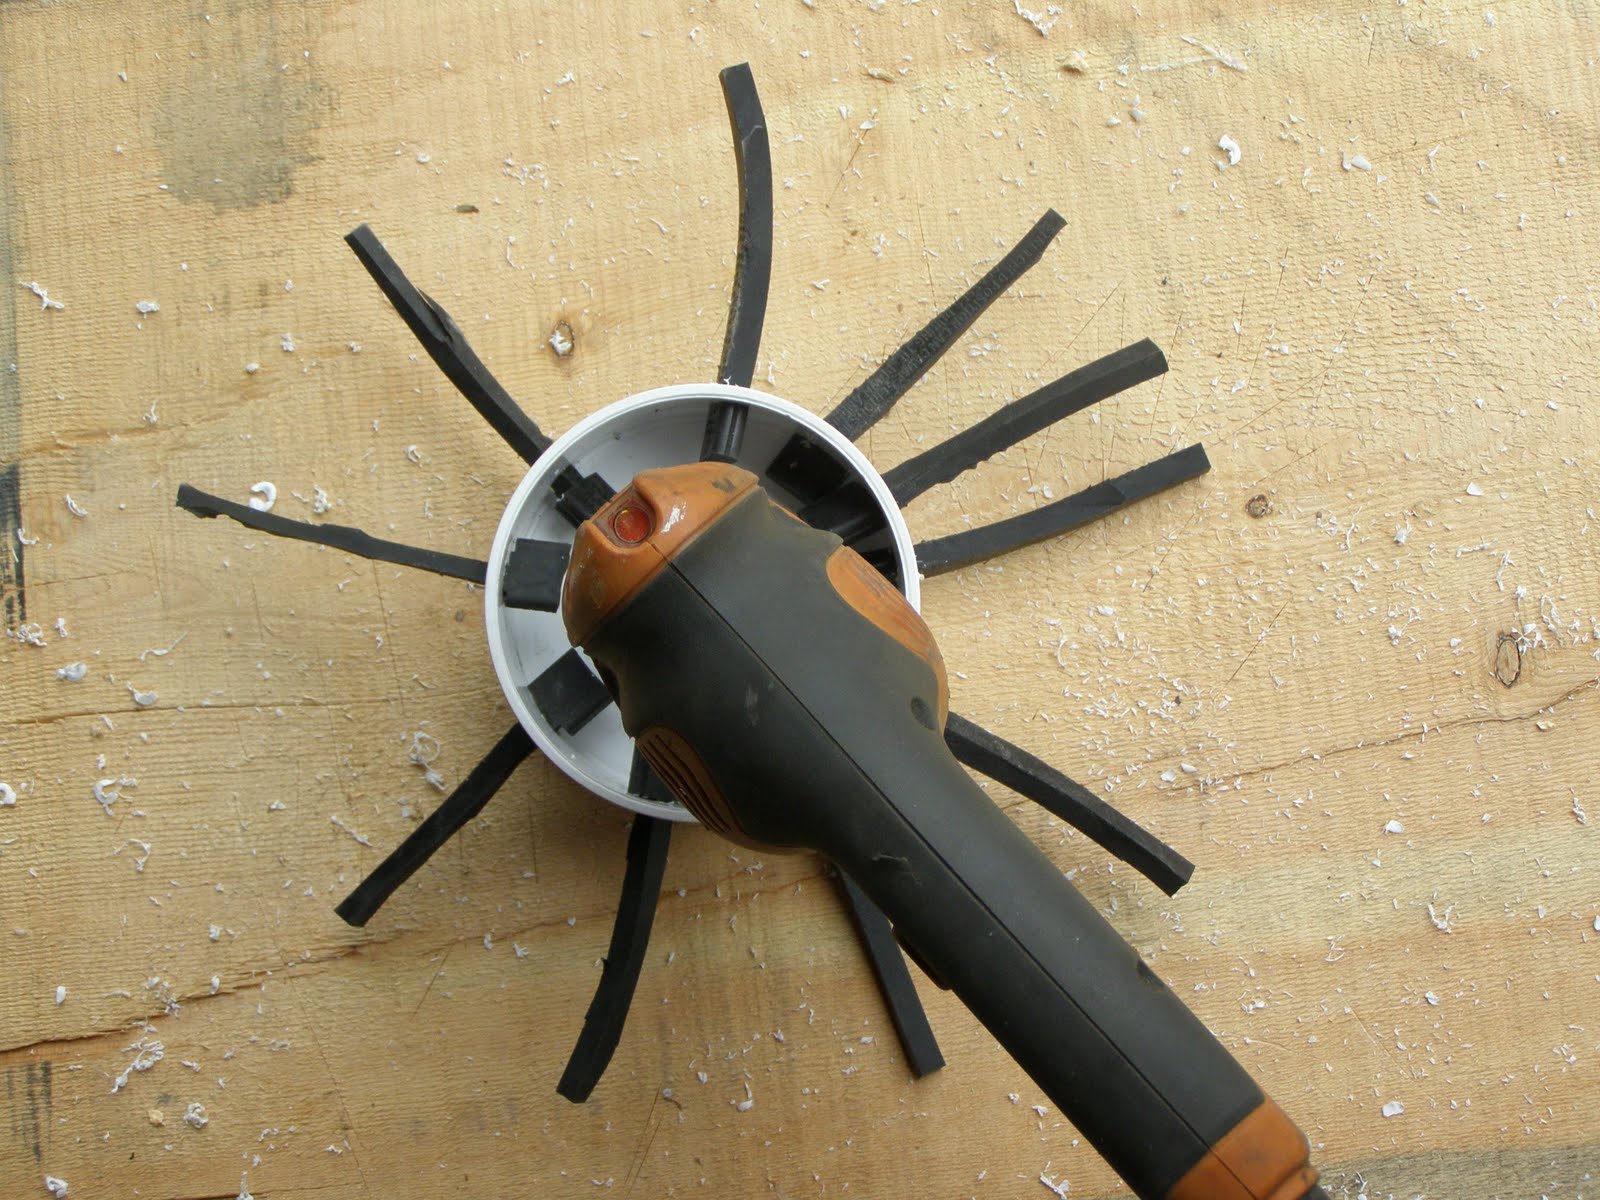
I drilled a 3/8 hole in the center of the cap and slipped the bolt through. The drill can grab onto the threaded end of the bolt. Put the nut on the other side and tighten it to the cap.

I drilled a bunch of holes in the side of the endcap about 2" apart from each other. Then I took the bungees and cut them into about 4" long pieces. I then sliced about a quarter of an inch off each side and left about 3/4 of an inch on the end, fully intact. This way you can slip the bungee through the holes and it will catch when it hits the larger part of the bungee. (See the photo below)


And there it is. Ready for plucking.


The next part of the process actually took longer than making the thing. I needed to strap and wire the drill to the table so that I could keep both hands on the chicken and have the drill going. I put a zip tie on the drill trigger so it was always on and I took a ratchet strap and some wire and fooled with it till it was pretty stable on the table.
At first, it was zip tied to full power. That was WAY too much. I eventually had it on at about 3/4 of full speed.

Feathers went everywhere. Wear safety glasses for sure. Feathers were in my face, all over the driveway, and on the dogs heads. I think the fancy tub pluckers keep all the feathers centrally located, but this one does the job. Here's a photo of the finished product, ready to go into the freezer or cut into wings, thighs, legs, and breasts.

Here's Katie Rose weighing the bird in at about 6 lbs.


Feel free to comment below and remember that you can click on the photos to enlarge them. Hope to have you over for chicken dinner!